Tuesday, February 2, 2010

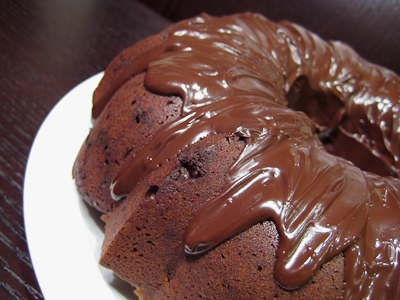
Milk Chocolate Bundt Cake (TWD)


This week's Tuesdays with Dorie (TWD) recipe was chosen by Kristin of I'm Right About Everything: Milk Chocolate Mini Bundt Cakes.

This week's post is particularly short because I've been busy with the baby - I was happy to even get the baking time in! I don't have mini bundt cake pans, so I doubled the recipe and used my regular bundt pan.

Some folks seemed to have some trouble with the chocolate glaze so I took the tip from one of the bakers in our group to halve the corn syrup and that seemed to do the trick, as my glaze turned out just fine.


My husband got to bring this one in to work, so I didn't get to try it. He said it was a decent cake, but a little dry. That seemed to be the general opinion on this one - that it was just okay. If you're looking for a good chocolate cake recipe, try the "She Ain't Heavy" Chocolate Cake recipe, or the Cocoa-Buttermilk Cake recipe.

Thanks, Kristin, for hosting this week. If you would like the recipe, you can find it here. Make sure you check out the TWD Blogroll, to see how everyone else enjoyed these mini chocolate treats!

* Recipes notes:
- If making this in a regular bundt pan, double the recipe.
- You can also make cupcakes instead of mini bundt cakes with this recipe.
- For the chocolate glaze, only add 1 teaspoon of corn syrup to the melted chocolate. If making a regular size bundt cake, make 1.5x the glaze recipe.
- For tips from other TWD bakers, click here.

Wednesday, January 27, 2010

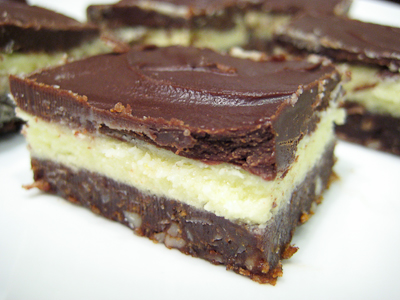
Homemade Graham Crackers and Nanaimo Bars (DB)


The January 2010 Daring Bakers’ challenge was hosted by Lauren of Celiac Teen. Lauren chose Gluten-Free Graham Wafers and Nanaimo Bars as the challenge for the month. The sources she based her recipe on are 101 Cookbooks and www.nanaimo.ca.

The first part of the challenge entailed making homemade graham crackers. Ideally, these were to be gluten free, but I didn't get a chance to go to the store to pick up the necessary sweet rice flour, tapioca starch, and sorghum flour. Instead, I made whole wheat graham crackers. I made a half recipe and it was more than enough for the Nanaimo bars - a quarter recipe would have been just fine. The only problem I ran into was how sticky the dough was - even after being chilled. Definitely flour both the dough and your work surface generously while you are rolling it out or else you'll end up with a big sticky mess. I didn't end up with the most attractive looking graham crackers for this reason, but next time I know to use more flour.


The second part of this challenge was to use our homemade graham crackers in Nanaimo Bars (pronounced Nah-nye-Moh), in honor of the upcoming 2010 Winter Olympics in Vancouver. Nanaimo Bars are a classic Canadian dessert created in none other than Nanaimo, British Colombia. These bars have 3 layers: a base containing graham crackers, cocoa, coconut and almonds, a middle custard layer, and a topping of chocolate. They are extremely rich and available almost everywhere across the country.

The bars are actually a no bake dessert, something that I didn't notice initially until I started making them. I don't have an 8-inch square pan, so I used my 9-inch pan. I made everything according to the recipe, except I doubled the top chocolate layer in order to have enough to spread across the entire pan. It was probably a bit thicker than it was supposed to be, but it didn't really seem to throw off the flavors (proportionately) at all.
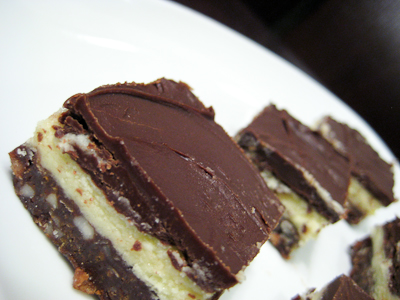

Aside from cracks in the top layer when I went to cut these bars, they turned out great. From the comments I had read, I was expecting something super rich and almost too sweet. However, I did not find that to be the case at all. They are sweet and rich but not overly so. I thought they tasted a lot like a Mounds candy bar, but my husband didn't really think so. Either way, the crunch from the almonds and the chew from the coconut both gave these bars a nice texture.

Thanks Lauren, for hosting this month's challenge. I loved these and will definitely be making them again! Make sure you check out the Daring Bakers' Blogroll to see how everyone else enjoyed these Canadian treats!


Gluten-Free Graham Wafers

1 cup (138 g) (4.9 ounces) Sweet rice flour (also known as glutinous rice flour)
3/4 cup (100 g) (3.5 ounces) Tapioca Starch/Flour
1/2 cup (65 g) (2.3 ounces) Sorghum Flour
1 cup (200 g) (7.1 ounces) Dark Brown Sugar, Lightly packed
1 teaspoon (5 mL) Baking soda
3/4 teaspoon (4 mL ) Kosher Salt
7 tablespoons (100 g) (3 ½ ounces) Unsalted Butter (Cut into 1-inch cubes and frozen)
1/3 cup (80 mL) Honey, Mild-flavoured such as clover.
5 tablespoons (75 mL) Whole Milk
2 tablespoons (30 mL) Pure Vanilla Extract

Directions:
1. In the bowl of a food processor fitted with a steel blade, combine the flours, brown sugar, baking soda, and salt. Pulse on low to incorporate. Add the butter and pulse on and off, until the mixture is the consistency of a coarse meal. If making by hand, combine aforementioned dry ingredients with a whisk, then cut in butter until you have a coarse meal. No chunks of butter should be visible.
2. In a small bowl or liquid measuring cup, whisk together the honey, milk and vanilla. Add to the flour mixture until the dough barely comes together. It will be very soft and sticky.
3. Turn the dough onto a surface well-floured with sweet rice flour and pat the dough into a rectangle about 1 inch thick. Wrap in plastic and chill until firm, about 2 hours, or overnight.
4. Divide the dough in half and return one half to the refrigerator. Sift an even layer of sweet rice flour onto the work surface and roll the dough into a long rectangle, about 1/8 inch thick. The dough will be quite sticky, so flour as necessary. Cut into 4 by 4 inch squares. Gather the scraps together and set aside. Place wafers on one or two parchment-lined baking sheets. Chill until firm, about 30 to 45 minutes. Repeat with the second batch of dough.
5. Adjust the rack to the upper and lower positions and preheat oven to 350 degrees Fahrenheit (180 degrees Celsius).
6. Gather the scraps together into a ball, chill until firm, and reroll. Dust the surface with more sweet rice flour and roll out the dough to get a couple more wafers.
7. Prick the wafers with toothpick or fork, not all the way through, in two or more rows.
8. Bake for 25 minutes, until browned and slightly firm to the touch, rotating sheets halfway through to ensure even baking. Might take less, and the starting location of each sheet may determine its required time. The ones that started on the bottom browned faster.
9. When cooled completely, place enough wafers in food processor to make 1 ¼ cups (300 mL) of crumbs. Another way to do this is to place in a large ziplock bag, force all air out and smash with a rolling pin until wafers are crumbs.

*Note: The graham wafers may be kept in an airtight container for up to 2 weeks. If making the graham crackers with wheat, replace the gluten-free flours (tapioca starch, sweet rice flour, and sorghum flour) with 2 ½ cups plus 2 tbsp of all-purpose wheat flour, or wheat pastry flour. Watch the wheat-based graham wafers very closely in the oven, as they bake faster than the gluten-free ones, sometimes only 12 minutes. (I found that mine still baked up in about 25 minutes.)

Nanaimo Bars

Bottom Layer
1/2 cup (115 g) (4 ounces) Unsalted Butter
1/4 cup (50 g) (1.8 ounces) Granulated Sugar
5 tablespoons (75 mL) Unsweetened Cocoa
1 Large Egg, Beaten
1 1/4 cups (300 mL) (160 g) (5.6 ounces) Gluten Free Graham Wafer Crumbs (See previous recipe) - If making the graham wafers just for the Nanaimo bars, you can go with just 0.25x the original recipe
1/2 cup (55 g) (1.9 ounces) Almonds (Any type, Finely chopped)
1 cup (130 g) (4.5 ounces) Coconut (Shredded, sweetened or unsweetened) I used sweetened

Middle Layer
1/2 cup (115 g) (4 ounces) Unsalted Butter
2 tablespoons and 2 teaspoons (40 mL) Heavy Cream
2 tablespoons (30 mL) Vanilla Custard Powder (Such as Bird’s. Vanilla pudding mix may be substituted.)
2 cups (254 g) (8.9 ounces) Icing Sugar

Top Layer (I doubled this for my 9-inch pan)
4 ounces (115 g) Semi-sweet chocolate
2 tablespoons (28 g) (1 ounce) Unsalted Butter

Directions:
1. For bottom Layer: Melt unsalted butter, sugar and cocoa in top of a double boiler. Add egg and stir to cook and thicken. Remove from heat. Stir in crumbs, nuts and coconut. Press firmly into an ungreased 8 by 8 inch pan.
2. For Middle Layer: Cream butter, cream, custard powder, and icing sugar together well. Beat until light in colour. Spread over bottom layer.
3. For Top Layer: Melt chocolate and unsalted butter over low heat. Cool. Once cool, pour over middle layer and chill.

*Note: These bars freeze very well, so don’t be afraid to pop some into the freezer.

Tuesday, January 19, 2010

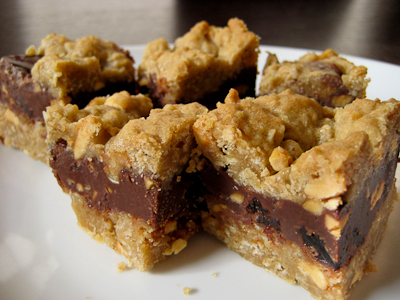
Chocolate Oatmeal Almost-Candy Bars (TWD)


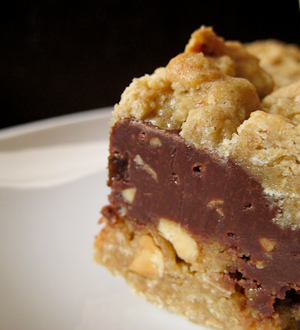
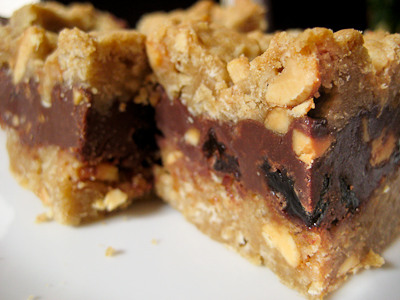
This week's Tuesdays with Dorie (TWD) recipe was chosen by Lillian of Confectiona's Realm: Chocolate Oatmeal Almost-Candy Bars. Take a fudgey chocolate layer filled with peanuts and raisins and sandwich it between an oatmeal and peanut layer and you've got Dorie's "Almost-Candy Bars."


These were fairly simple to make, though it seems like every time we have a recipe that uses raisins, there's a huge debate amongst the TWD bakers about the inclusion/exclusion/substitution of raisins. I personally have no problem with raisins in my baked goods, and if you like raisinettes, I don't know why you wouldn't like other things that have both chocolate and raisins in them. So I went ahead and included the raisins in this recipe. Sometimes I'll substitute dried cranberries (craisins) for raisins in a recipe, but just to change things up a bit, not because I don't like raisins with my chocolate!


To be honest, I did not really taste the raisins in this recipe. They're there and add a nice flavor but I'm not sure anyone who tried them could really tell that there were raisins in these. I enjoyed them quite a bit - to me, they tasted like a chocolate peanut butter oatmeal raisin cookie bar more than anything else. Personally, I think the "almost-candy bar" part is a bit of a misnomer. The Snickery Squares are more candy bar-like than these. Regardless of what you call them, they make a great snack.

Thanks, Lillian, for hosting this week. If you would like the recipe, you can find it here. Make sure you check out the TWD Blogroll, to see how everyone else enjoyed these sweet treats!

* Recipes notes:
- This recipe makes a lot of bars, so consider halving the recipe if you don't have friends or coworkers to share these with.
- The topping does not spread much in the oven, so what you see is what you get after you add the topping.
- Wrapped well, these will keep for about four days at room temperature, 1 week in the refrigerator, or up to two months in the freezer.
- For tips from other TWD bakers, click here.

Sunday, January 10, 2010

All-American Baby Ruth Pie (SMS)


This week's Sweet Melissa Sundays (SMS) recipe was chosen by Donna of L’Amour de Tarte: Chocolate Pie Crust. We were given the opportunity to fill the pie crust with the filling of our choice, using a recipe outside of the cookbook. I've seen chocolate cookie crusts before, but never a chocolate pie crust, so I was curious to try this one. The recipe looked like most pie crust recipes, with the addition of some cocoa powder.


Although it's winter, I decided to try an ice cream "pie" recipe that I have had tucked away for quite some time. It was from a Nestle calendar I got in the mail, but you can also find it on verybestbaking.com. I simply used the chocolate pie crust from the Sweet Melissa Baking Book instead of the chocolate cookie crust. I also made my own chocolate ice cream, the recipe for which I'll post later.

How did it turn out? Sadly, the chocolate pie crust was a bit of a disappointment. I am not sure if it was just the shortening I used, but the crust had a very strong after taste of shortening that was unpleasant to say the least. The ice cream pie was great, but next time I need to make sure that I chop my Baby Ruth bars into even smaller pieces (or serve it after just one hour in the freezer) because the candy bits got a bit hard and difficult to eat.


If you would like to try the chocolate pie crust recipe, you can find it here. The Baby Ruth Pie recipe is below (I'd recommend sticking with the cookie crust), and I'll be posting the chocolate ice cream recipe soon.

All-American Baby Ruth Pie
from VeryBestBaking.com

18 (about 1 1/2 cups) crushed creme-filled chocolate cookies (Oreos)
3 tablespoons butter or margarine, melted
2 pints chocolate ice cream, softened
3 (2.1 ounces each) NESTLÉ BABY RUTH Candy Bars, finely chopped; or 9 fun size bars (I used 8 fun size bars)
1 cup miniature marshmallows
NESTLÉ NESQUIK Chocolate Flavor Syrup

Combine crushed cookies and butter in small bowl. Press onto bottom of 9-inch pie plate; freeze for 5 minutes.

Combine ice cream, chopped Baby Ruth and marshmallows in large bowl; spoon into prepared crust. Freeze for about 1 hour or until firm. Drizzle with Nesquik before serving.

Tuesday, January 5, 2010

Apricot Tarte Tatin (TWD)


This week's Tuesdays with Dorie (TWD) recipe was chosen by Laurie of Slush: Tarte Tatin. It's a particularly special week because it's TWD's 2nd anniversary! I can't believe it's already been two years since I first joined! I have learned so much during my time with the group and up until the birth of my baby, I had hardly ever missed a week. I'm hoping that once things settle down some, I'll be back to baking weekly... but for now, I wanted to make sure I didn't miss this special anniversary week! Plus, I love tarte tatin and couldn't pass up the chance to make it myself.

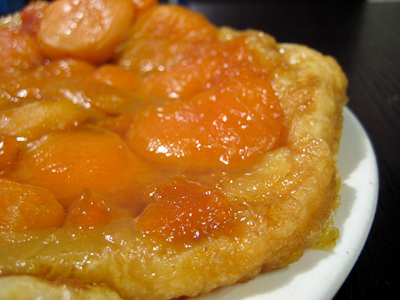
I originally wanted to make Apple Tarte Tatin, but the baby seems to be going through a growth spurt right now so she isn't allowing me very much free time. I meant to make this yesterday but didn't get to it until this afternoon. So, instead of having to peel and slice a bunch of apples, I opted to use canned apricots instead. I also used frozen puff pastry instead of making my own pie or tart dough to save some time.


I burned my first batch of caramel, despite watching it religiously and being careful with the heat... it was getting pretty dark and I wasn't sure if it was burnt, so I scooped a small bit out with a knife, let it cool, and then tasted it - definitely bitter. So, I dumped it out and started over and heated the butter and sugar until it was just barely caramelized. I think I didn't cook my caramel mixture long enough, though, because when I flipped it out of the skillet, it was very soupy. Next time I make this, I will just heat the butter and sugar slowly over low heat instead of medium heat (I think I waited too long to turn down the heat the first time).

Well, despite the soupy mess, my tarte tatin was fantastic! The buttery, caramel-y taste combined with the fruit and puff pastry was divine. Thanks, Laurie, for picking this recipe. Moreover, thanks for all the hard work you do as the founder of TWD. If you would like the recipe, you can find it here. Make sure you check out the TWD Blogroll, to see how everyone else enjoyed this wonderful French pastry.

* Recipes notes:
- Caramelize your sugar over low heat, not medium heat, to ensure it becomes a deep caramel color without burning.
- I baked my tarte tatin in a cast iron skillet for about 50-55 minutes, until my puff pastry was golden brown.
- For tips from other TWD bakers, click here.

Tuesday, December 29, 2009

Low and Luscious Chocolate Cheesecake (TWD)


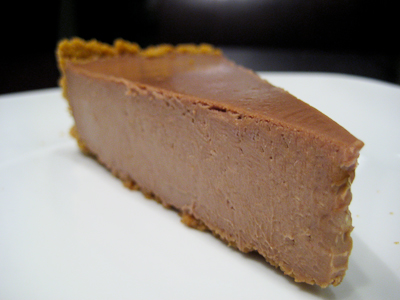
This week's Tuesdays with Dorie (TWD) recipe was chosen by The Tea Lady of Tea and Scones: Low and Luscious Chocolate Cheesecake. I almost didn't get this one done, but when I read over the recipe, I realized that I could easily put it together in a pinch.

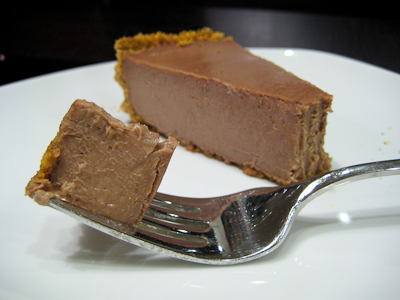
The cheesecake filling takes about all of five minutes to make in the food processor. You simply process the cream sugar and sugar until silky smooth. Then add the eggs, vanilla, and chocolate and then you're done!


The bottom of my graham cracker crust was extremely thin, so I would recommend doubling the crust recipe if you're a crust lover. Otherwise, this cheesecake was good. It's not overwhelmingly chocolately or creamy so if you are in the mood for a super chocolately, super rich cheesecake, I'd look for another recipe. I tend to prefer the super rich and creamy cheesecakes, but this was a nice change after so many heavy desserts over the holidays.

If you would like the recipe, you can find it here. Make sure you check out the TWD Blogroll, to see how everyone else enjoyed this creamy, chocolatey treat.

* Recipes notes:
- I baked my cheesecake in a 9-inch springform pan. I wrapped it in heavy duty foil and placed it in a water bath in the oven and baked for 50 minutes. After it was done, I left the oven cracked open with a wooden spoon until it reached room temperature in order to avoid cracks in the top.
- For tips from other TWD bakers, click here.

Sunday, December 27, 2009

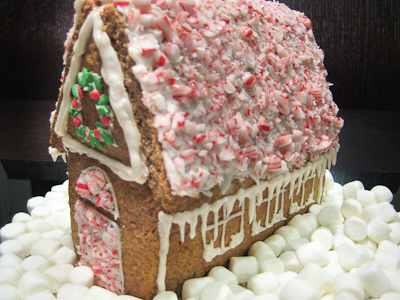
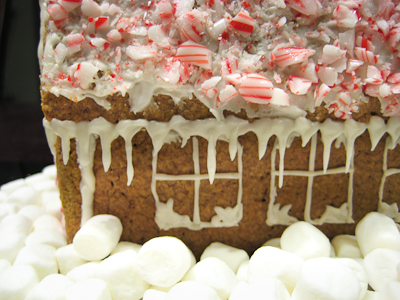
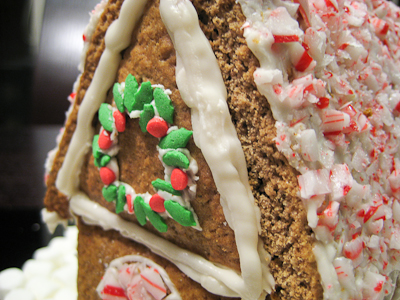
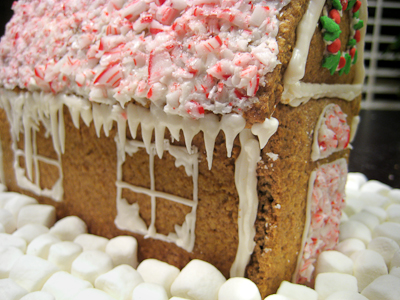
Gingerbread House (DB)


The December 2009 Daring Bakers’ challenge was brought to you by Anna of Very Small Anna and Y of Lemonpi. They chose to challenge Daring Bakers’ everywhere to bake and assemble a gingerbread house from scratch. They chose recipes from Good Housekeeping and from The Great Scandinavian Baking Book as the challenge recipes.


I wasn't able to participate in November's challenge due to the birth of my little one, and almost let this one pass me by but I was able to find some time at the last minute today to get this gingerbread house completed. As Katrina of Baking and Boys! commented on my previous post, everyone says you have to "sleep when baby sleeps," but when you're a Daring Baker you have to "bake when baby sleeps" instead ;)


The gingerbread was simple enough to make - just a few minutes to prep and then two hours to chill in the refrigerator. A few bakers noted that their dough was too dry, but I had no such issues with mine. The more time consuming aspect was (obviously) the assembly and decoration of the gingerbread house. I wish I could have made mine more elaborate, but with only short spurts of time available to me today, I had to go simple. I made a half recipe of gingerbread and a full recipe of royal icing and that seemed to be just right for my little house.

Thanks Anna and Y, for hosting this month's challenge. It was fun making my very first gingerbread house. Make sure you check out the Daring Bakers' Blogroll to see all the other wonderful creations.


Scandinavian Gingerbread (Pepparkakstuga)
from The Great Scandinavian Baking Book by Beatrice Ojakangas

1 cup butter, room temperature [226g]
1 cup brown sugar, well packed [220g]
2 tablespoons cinnamon
4 teaspoons ground ginger
3 teaspoons ground cloves
2 teaspoons baking soda
½ cup boiling water
5 cups all-purpose flour [875g]

1. In a large bowl, cream the butter and sugar until blended. Add the cinnamon, ginger and cloves. Mix the baking soda with the boiling water and add to the dough along with the flour. Mix to make a stiff dough. (*Make sure you don't overmix the dough initially as you'll over develop the gluten and make your dough tough and shrinky.) If necessary add more water, a tablespoon at a time. Chill 2 hours or overnight.

2. Cut patterns for the house, making patterns for the roof, front walls, gabled walls, chimney and door out of cardboard.

3. Roll the dough out on a large, ungreased baking sheet and place the patterns on the dough. Mark off the various pieces with a knife, but leave the pieces in place.

4. [I rolled out the dough on a floured bench, roughly 1/8 inch thick (which allows for fact that the dough puffs a little when baked), cut required shapes and transferred these to the baking sheet. Any scraps I saved and rerolled at the end.]

5. Preheat the oven to 375'F (190'C). Bake for 12 to 15 minutes until the cookie dough feels firm. After baking, again place the pattern on top of the gingerbread and trim the shapes, cutting the edges with a straight-edged knife. Leave to cool on the baking sheet.

Royal Icing:

1 large egg white
3 cups (330g) powdered sugar
1 teaspoon white vinegar
1 teaspoon almond extract

Beat all ingredients until smooth, adding the powdered sugar gradually to get the desired consistency (I used about 2.5 cups of powdered sugar). Pipe on pieces and allow to dry before assembling. If you aren't using it all at once you can keep it in a small bowl, loosely covered with a damp towel for a few hours until ready to use. You may have to beat it slightly to get it an even consistency if the top sets up a bit. Piped on the house, this will set up hard over time.