Jana of
Cherry Tea Cakes was our July
Daring Bakers’ host and she challenges us to make Fresh Frasiers inspired by recipes written by Elisabeth M. Prueitt and Chad Robertson in the beautiful cookbook
Tartine. The Frasier is a light, moist layered chiffon cake, split and filled with sliced fresh fruit and pastry cream, then topped with a thin sheet of almond paste.
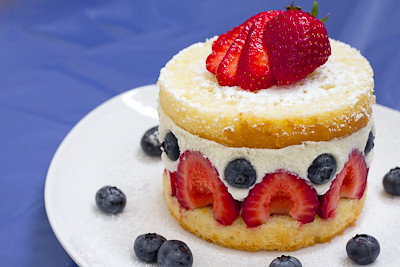
I love fresh fruit and this challenge was the perfect way to showcase some of summer's fresh fruits! I omitted the optional layer of almond paste on top, mostly just because I didn't have any on hand, but followed the rest of the recipe exactly. I made an orange chiffon cake and filled it with strawberries and blueberries. I made the simple syrup with 2 tablespoons of orange juice and 2 tablespoons of triple sec. I was concerned the flavor of the alcohol would be too strong if I added the full 4 tablespoons of alcohol, but in retrospect I think it would have been much better that way.
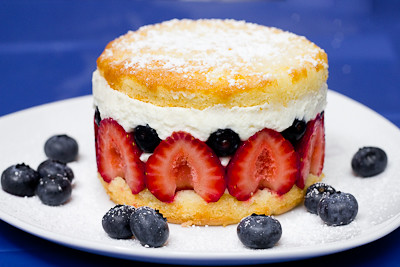
Regardless, this cake was amazing. The chiffon had an incredibly light but moist crumb. (It is also special to me because this was the first time that my 20 month old helped me make a cake! She helped mix the cake batter (before the egg whites were added!) and it was so great to see how much fun she was having helping her mommy out.) The pastry cream was delicious, though I think calling it a "pastry cream" makes it sound heavier than it actually is. Most pastry creams are made with multiple egg yolks (thus lending them their richness); this one is made with just one whole egg. So it's more like whipped cream with a little pastry cream added in. This keeps the dessert from being too heavy, and adds just a touch of richness to it. I basically loved everything about this dessert. Just look at all those fresh berries swimming in pastry cream! Yum!
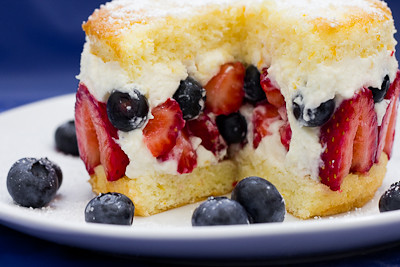
While this dessert is compromised of several components, each part on its own is very simple and you can make each individual component ahead of time and then assemble it all when needed. Plus, if you are short on time, you can just make a trifle with the cake, fruit, and pastry cream! It's every bit as good without any of the fuss.
Thanks Jana, for hosting this month's challenge. I've never had or made a Fresh Frasier before, but I fell in love with them and definitely plan to make them again in the future! Make sure you check out the
Daring Bakers' Blogroll to see how everyone else enjoyed this sweet, summery treat.
* Recipe notes -
- When cutting parchment rounds for your pan(s), don't forget to check out my helpful tip here! - I made my chiffon cakes in mini springform pans. One chiffon cake recipe (below) will fit in four to five mini springform pans (depending on how thick you want them to be). Depending on how thick or thin you want your cake layers to be, you can cut them into either three or four layers once they are cooled. (I made four mini cakes and found that cutting them into two layers yielded layers that were too thick for this dessert.)
- Please note that the cake, like all chiffon cakes, will rise quite a bit, so do not overfill your pan(s)! You only want to fill them about half way, or two-thirds at most.
- Baking time was approximately 30 minutes for the mini cakes.
Fresh Frasiers
 Basic Chiffon Cake:
Ingredients:
1 cup + 2 tablespoons (270 ml) (5½ oz/155 gm) all-purpose flour
1 teaspoon (5 ml) (4 gm) baking powder
3/4 cups (180 ml) (6 oz /170 gm) sugar
1/2 teaspoon (2½ ml) (1½ gm) salt, preferably kosher
1/4 cup (2 fl oz/60 ml) vegetable oil
3 large egg yolks
⅓ cup + 1 tablespoon (3.17 fl oz/95 ml) water
1 teaspoon (5 ml) pure vanilla extract
3/4 teaspoon (3¾ ml) (3 gm) lemon zest, grated
5 large egg whites
¼ teaspoon (1¼ ml) (1 gm) cream of tartar
Directions:
Preheat the oven to moderate 325°F (160°C/gas mark 3).
Line the bottom of an 8-inch (20 cm) spring form pan with parchment paper. Do not grease the sides of the pan.
In a large mixing bowl, stir together the flour and baking powder. Add in all but 3 tablespoons (45 ml.) of sugar, and all of the salt. Stir to combine.
In a small bowl combine the oil, egg yolks, water, vanilla and lemon zest. Whisk thoroughly.
Combine with the dry ingredients and mix thoroughly for about one minute, or until very smooth.
Put the egg whites into a stand mixer, and beat on medium speed using a whisk attachment on a medium speed, until frothy. Add cream of tartar and beat on a medium speed until the whites hold soft peaks. Slowly add the remaining sugar and beat on a medium-high speed until the whites hold firm and form shiny peaks.
Using a grease free rubber spatula, scoop about ⅓ of the whites into the yolk mixture and fold in gently. Gently fold in the remaining whites just until combined.
Pour the batter into the prepared pan. Bake for 45 to 55 minutes or until toothpick inserted into the center comes out clean.
Removed the cake from the oven and allow to cool in the pan on a wire rack.
To unmold, run a knife around the sides to loosen the cake from the pan and remove the spring form sides. Invert the cake and peel off the parchment paper. Refrigerate for up to four days.
Variations to the Basic Chiffon Cake:
Lemon Chiffon Cake
Ingredient Alterations:
Reduce water to 1/4 cup (60 ml)
Add 1/8 cup (30 ml) lemon juice
Increase lemon zest to 1½ teaspoon (7½ ml) (5 gm)
Remove the vanilla from the recipe
Direction Alterations:
Follow the directions, same as above, adding the lemon juice and zest to the oil, egg yolks and water in step 4.
Orange Chiffon Cake
Ingredient Alterations:
Replace the full amount of water with orange juice
Replace lemon zest with the zest of one orange
Remove the vanilla from the recipe
Direction Alterations:
Follow the directions, same as above, adding the orange juice and zest to the oil, and egg yolks in step 4.
Coconut Chiffon Cake
Ingredient Alterations:
Add ¼ teaspoon (1¼ ml) (1 gm) freshly ground nutmeg
Reduce oil to 1/8 cup (1 fl oz/30ml)
Reduce water to 1/8 cup (1 fl oz/30ml)
Add 1/3 cup (2 ⅔fl oz/80 ml) unsweetened coconut milk
Remove the vanilla from the recipe
Direction Alterations:
Follow the directions, same as above, adding the nutmeg to the flour mixture in step 3, and the coconut milk to the oil, water and egg yolks in step 4.
Chocolate Chiffon Cake
Ingredient Alterations:
Reduce all-purpose flour to ¾ cup + 1 tablespoon (195 ml) (4 oz/110 g)
Add 1/4 cup (60 ml) (3/4 oz/20 g) cocoa powder
Direction Alterations:
Follow the directions, same as above, adding the cocoa to the flour mixture in step 3.
Pastry Cream Filling:
Ingredients:
1 cup (8 fl oz/250 ml) whole milk
1/2 teaspoon (2½ ml) pure vanilla extract
1/8 teaspoon (1/2 ml) (¼ gm) salt, preferably kosher
2 tablespoons (30 ml) (10 gm)cornstarch
1/4 cup (60 ml) (2 oz/55 gm) sugar
1 large egg
2 tablespoons (30 ml) (1 oz/30 gm) unsalted butter
3/4 teaspoon (3¾ ml) (4 gm) gelatin
1/2 tablespoon (7½ ml) water
1 cup (8 fl oz/250 ml) heavy cream
Directions:
Pour the milk, vanilla, and salt into a heavy sauce pan. Place over medium-high heat and scald, bringing it to a near boiling point. Stir occasionally.
Meanwhile, in a stand mixer add the cornstarch and sugar. Whisk to combine
Add the eggs to the sugar and cornstarch and whisk until smooth.
When the milk is ready, gently and slowly while the stand mixer is whisking, pour the heated milk down the side of the bowl into the egg mixture.
Pour the mixture back into the warm pot and continue to cook over a medium heat until the custard is thick, just about to boil and coats the back of a spoon.
Remove from heat and pass through a fine mesh sieve into a large mixing bowl. Allow to cool for ten minutes stirring occasionally.
Cut the butter into four pieces and whisk into the pastry cream a piece at a time until smooth.
Cover the cream with plastic wrap, pressing the plastic wrap onto the top of the cream to prevent a skin from forming. Chill in the refrigerator for up to five days.
In a small dish, sprinkle the gelatin over the water and let stand for a few minutes to soften.
Put two inches (55 mm) of water into a small sauce pan and bring to a simmer over a medium heat.
Measure 1/4 cup (2 oz/60 ml) of the chilled pastry cream into a small stainless steel bowl that will sit across the sauce pan with the simmering water, without touching the water.
Heat the cream until it is 120 F (48.8 C). Add the gelatin and whisk until smooth. Remove from the water bath, and whisk the remaining cold pastry cream in to incorporate in two batches.
In a stand mixer, fitted with the whisk attachment, whip the cream until it holds medium-stiff peaks.
Immediately fold the whipped cream into the pastry cream with a rubber spatula.
Simple Syrup:
You may choose to flavor the syrup. One way is to use flavored sugar (for example: apple cider sugar, orange sugar, or vanilla sugar) or to stir in 1-2 teaspoons of flavored extract. You may also infuse with herbs or spices, if desired or add four tablespoons (60 ml) of fruit juice or liqueur while the syrup is cooling.
Ingredients:
1/3 cup (2⅔ fl oz/80 ml) (2⅔ oz/75 gm) of sugar, flavored or white
1/3 cup (2⅔ fl oz/80 ml) of water
Directions:
Combine the water and sugar in a medium saucepan.
Bring the mixture to a boil and let the sugar dissolve. Stirring is not necessary, but will not harm the syrup.
Remove the syrup from the heat and cool slightly.
Transfer syrup to a lidded container or jar that can be stored in the refrigerator. Simple syrup can be stored for up to one month.
Fraisier Assembly:
Components:
1 baked 8 inch (20 cm) chiffon cake
1 recipe pastry cream filling
⅓ cup (80 ml) simple syrup or flavored syrup
2 lbs (900 g) strawberries
confectioners’ sugar for dusting
½ cup (120 ml) (5 oz/140 gm) almond paste
Directions:
Line the sides of a 8-inch (20 cm) spring form pan with plastic wrap. Do not line the bottom of the pan.
Cut the cake in half horizontally to form two layers.
Fit the bottom layer into the prepared spring form pan. Moisten the layer evenly with the simple syrup.
When the cake has absorbed enough syrup to resemble a squishy sponge, you have enough.
Hull and slice in half enough strawberries to arrange around the sides of the cake pan. Place the cut side of the strawberry against the sides of the pan, point side up forming a ring.
Pipe cream in-between strawberries and a thin layer across the top of the cake.
Hull and quarter your remaining strawberries and place them in the middle of the cake. Cover the strawberries and entirely with the all but 1 tbsp. (15 ml) of the pastry cream.
Place the second cake layer on top and moisten with the simple syrup.
Lightly dust a work surface with confectioners' sugar and roll out the almond paste to a 10-inch (25 cm) round 1/16 inch (1.5 mm) thick. Spread the remaining 1 tablespoon (15 ml) of pastry cream on the top of the cake and cover with the round of almond paste.
Cover with plastic wrap and refrigerate for at least 4 hours.
To serve release the sides of the spring form pan and peel away the plastic wrap.
Serve immediately or store in the refrigerator for up to 3 days.


 Posts
Posts